Screen recording is a quite useful and convenient feature in iOS 11. Similar to taking a screenshot on iPhone, screen recording can also help you keep important information for future use or share funning things with friends. If you want to record your iPhone screen, no matter it's iPhone 8, iPhone 8 Plus or iPhone X or other iPhones in iOS 11, you can read the step below and apply the tip on your device to record screen on your iPhone.
How to record iPhone screen in iOS 11
You can easily record screen on iPhone 8/8 Plus/X with the help you Control Center, which requires you to add the Screen Recording feature to it first via Settings App. Follow the detailed steps below to learn how to record your iPhone 8/8 Plus/X screen.
Step 1: Go to Settings > Control Center > Customize Control from your iPhone in iOS 11. (Many things can be done with Settings. For example, when you want to invert colors on iPhone 8/8 Plus/X, you can go to Settings App to make it.)
Step 2: Scroll down to the MORE CONTROLS section and tap on the Plus Sign next to Screen Recording. (To adjust the order of the controls, you can tap on the Hamburger icon next to the control and rearrange it according to your needs.)
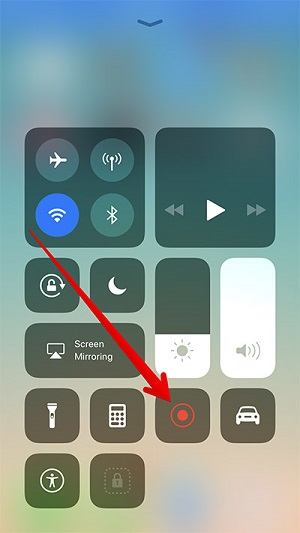
Step 3: When you want to record your iPhone screen, open Control Center by swiping up from the bottom of your iPhone screen.
- If you want to record screen on your iPhone without sound, tap on the Screen Recording icon in Control Center, wait for 3 seconds and the screen recording will begin.
- If you want to capture both screen and sound, press deeply on the Screen Recording icon, click the Microphone Audio icon to turn it on, tap on Start Recording, wait for 3 seconds and the screen recording will begin.
Step 4: When you want to end the screen recording, open Control Center again to click the Screen Recording icon or tap on the RED BAR at the top of your iPhone screen and choose Stop.
Step 5: Go to Photos > Albums > Videos to check the recorded videos.
![How to record iPhone Screen in iOS 11]()
Notes:
Since you are an iPhone user, I guess you may need a completely free iOS data transfer tool whenever you need to transfer data to or out of your iPhone. The tool recommended here is EaseUS MobiMover Free. With MobiMover installed on your PC running Windows 7 or later, you can transfer files between an iOS device (iPhone/iPad in iOS 8 or later) and computer or between two iOS devices without any cost and limitation. As a free alternative to iTunes, MobiMover can also help you manage your iOS contents from the computer. The file types you can transfer or manage include photos, audios (music, ringtones, audiobooks, voice memos, playlists), videos (movies, TV shows, home videos, music videos, photo videos), contacts, messages and more. Thus things like adding music to iPhone become quite easy for you with the help of MobiMover. Download MoiMover and start to use it to back up your iPhone data to the Windows PC without iTunes.
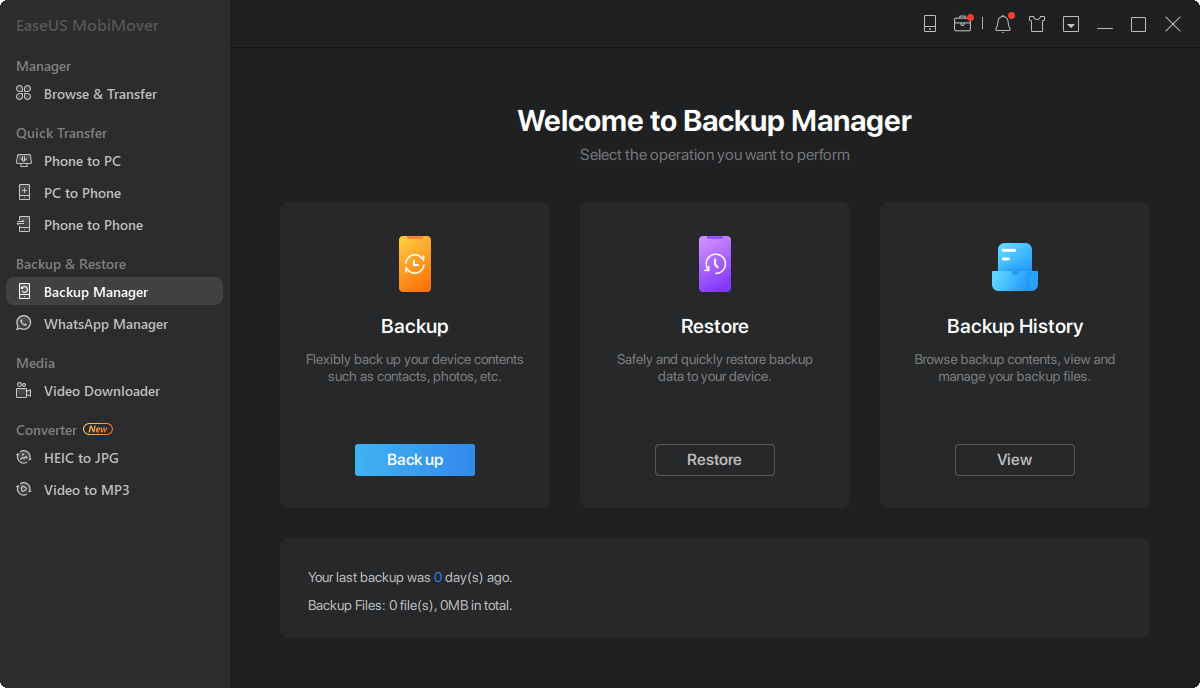
Step 1. Connect your iPhone to your computer running Windows system with a USB cable > Select the "Backup Manager" from the left panel > Select "Backup" to proceed.
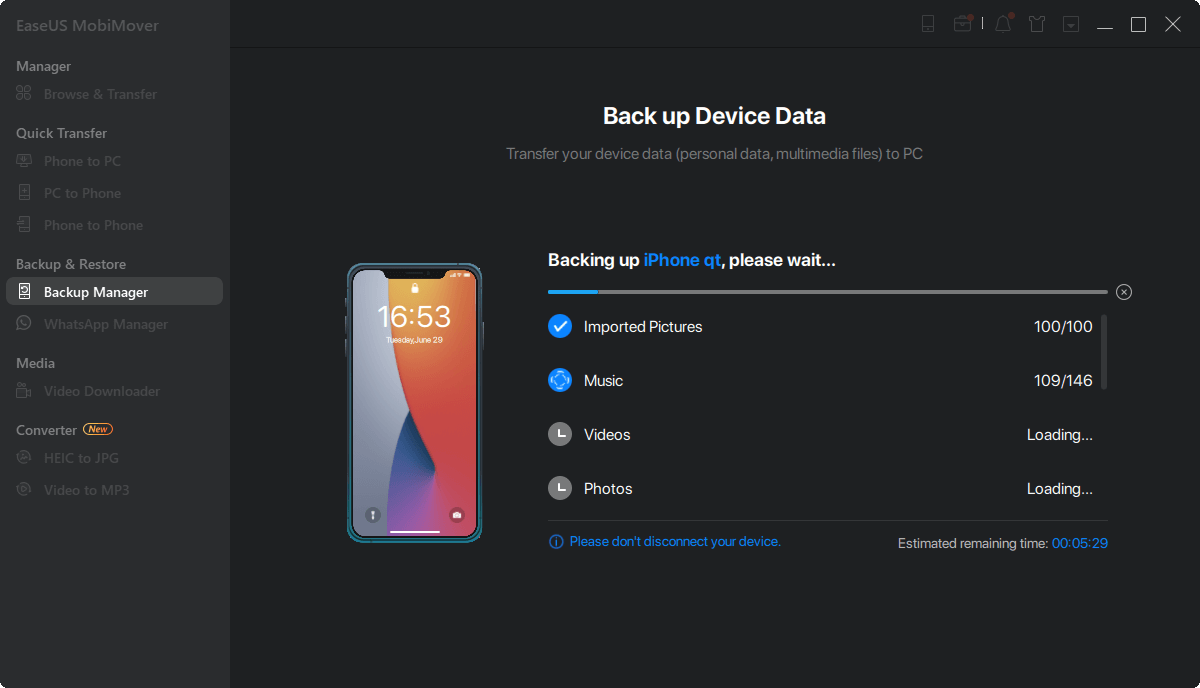
Step 2. Tick the box next to "Select All" to back up all files from iPhone to computer > Set the destination on computer > Click on "One-Click Backup" to start the backup process.
Step 3. MobiMover will start immediately to back up iPhone files to your computer without requiring iTunes. Wait patiently until it finishes.
 NEW
NEW HOT
HOT