How to Transfer MP3 from iPhone to Computer [Mac & PC]
Myra updated on Oct 10, 2024 to iPhone Data Transfer
If your iPhone's storage is full of mp3 files, you should consider backing up to your home PC or Mac. We'll show you how to back up your mp3 files from your iPhone to your computer.
Transferring MP3 files from an iPhone to a computer is needed in many situations, such as:
Whatever your purpose of doing so, you can do this by using iTunes or EaseUS MobiMover. In this guide, we will show you the steps in detail.
iTunes should be your first option to transfer files from a computer to an iPhone or vice versa. But before you proceed, there is one thing that is worthy of attention - iTunes only supports transferring purchased songs, and the songs you transfer to the computer can't be opened.
To download MP3 files from iPhone to computer via iTunes:
Step 1. Download and launch the latest version of iTunes on your computer.
Step 2. Connect your iPhone to the computer.
Step 3. In the upper left corner of your iTunes window, click on "File" > "Device" > "Transfer Purchases from..."
Step 4. If required, you'll need to authorize your computer by going to the "Accounts" > "Authorization," and then choose to authorize the computer.
Step 5. Wait for the transfer process to complete.
Step 6. Then, click "Recently Added" from the left side of the iTunes window,
Step 7. Choose the purchased music that you want to download and click on the "Download" button.
If you have MP3 files on your iPhone that were not purchased via iTunes, you have to turn to some third-party transfer tools for help. Here we mainly recommend this iPhone data transfer tool - EaseUS MobiMover. As an app to connect iPhone to PC, EaseUS MobiMover works perfectly to transfer various iOS files, including contacts, messages, videos, photos, and more, from iPhone to a PC or vice versa. Additionally, if you want to download MP3 from YouTube to iPhone, it is also possible with EaseUS MobiMover.
If you're interested in EaseUS MobiMover, follow these steps to transfer MP3 files from iPhone to a computer.
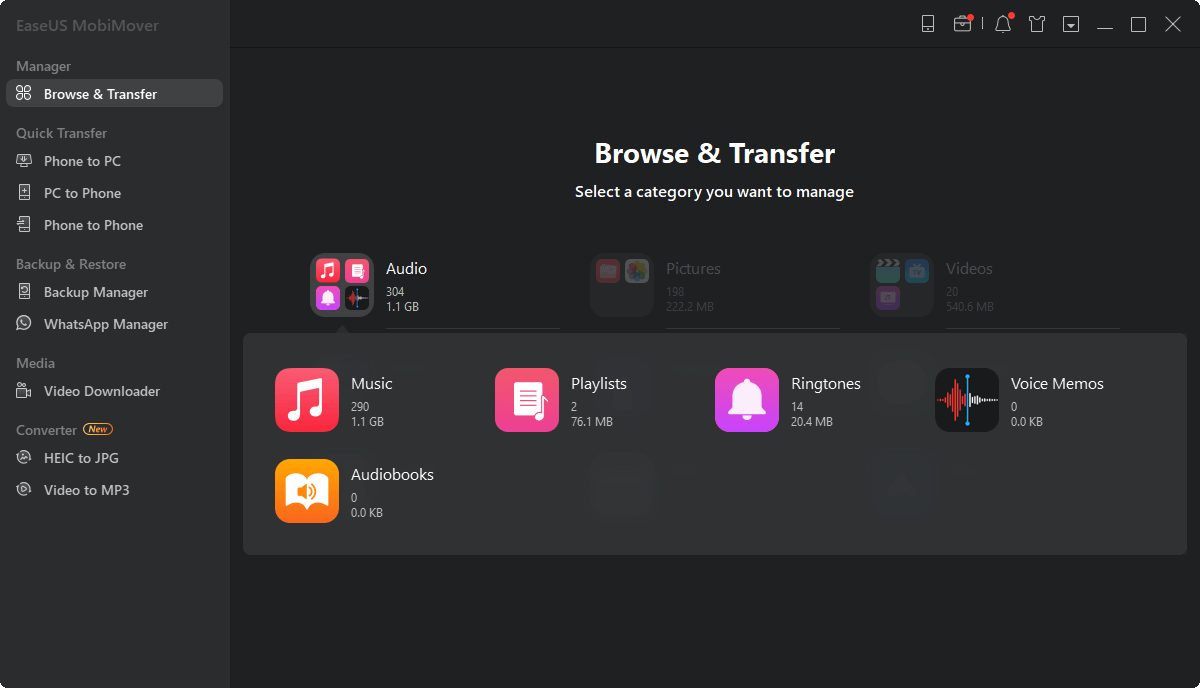
Step 1. Connect your iPhone to your computer and run EaseUS MobiMover on your PC > Tap "Trust" on your iPhone screen > Click "Allow" on EaseUS MobiMover to enable the program to access your iPhone > Click "Content Management" on the main screen > Click "Audio" > Select "Music" to continue.

Step 2. Select MP3 files on iPhone > Specify a secure location on PC to transfer > Can click "Music" to select MP3 music files on your iPhone for transferring.
Step 3. Click "Transfer to PC" to start the transferring process and wait for the transferring process to complete. If you didn't set a new spot for saving the music files, MobiMover will save the data to a folder named Exported by MobiMover on the desktop of your PC.
EaseUS MobiMover also helps to download MP3 to iPhone directly, which is a good choice if you prefer adding MP3 to iPhone without iTunes.
As you can see, both iTunes and EaseUS MobiMover can help you transfer MP3 files from iPhone to the computer. You can choose either of them to transfer music, depending on whether your songs are purchased or not. If they are purchased, you can use iTunes to transfer them. If not, just use EaseUS MobiMover instead.
Related Articles
How to Transfer Music from iPhone to Mac in 5 Ways
How to Transfer GoPro Videos to iPhone in 3 Ways
5 Ways to Transfer Apps from iPhone 13 to iPhone 15/16
Transfer Videos from iPhone to External Hard Drive👍