For most of the iPhone and iPad users, they know how to back up data with iCloud and how to restore iPhone with iCloud backup after resetting the device to the factory settings. Here, in this article, we will solve the question asked by many users, that is how to access iCloud photos on PC and how to view iCloud photos on Mac. We are going to offer you two common ways to this matter in following texts.
How to access/view iCloud photos on PC and Mac via iCloud.com
The ways to access iCloud photos on PC and view iCloud photos on Mac through icloud.com are the same as the mean to access iCloud PC. See specific guides below.
1. Open a browser on your PC or the Safari on your Mac, and go to www.iCloud.com.
2. Sign in with your Apple ID username and password. Then, you will get to the main interface of iCloud backup.
3. Now, click "Photos" > choose "All Photos", and you can view the iCloud photos on your PC/Mac like the sample screenshot below.
As well know, iCloud offers limited free storage. For freeing up iCloud space, you can delete multiple or all iCloud photos according to your demands, or you can choose to download the iCloud photos to your computer if you don’t want to remove the pictures directly.
How to access/view iCloud photos on PC and Mac via iCloud Control Panel
Viewing iCloud photos on PC and iCloud is a little bit different. You need to download iCloud for Windows before you can access it, while it's unnecessary on Mac, as the iCloud syncing settings are pre-installed.
You can download and install iCloud for Windows from support.apple.com/en-us/HT204283. Then, take the same way to view iCloud photos on PC and Mac as below.
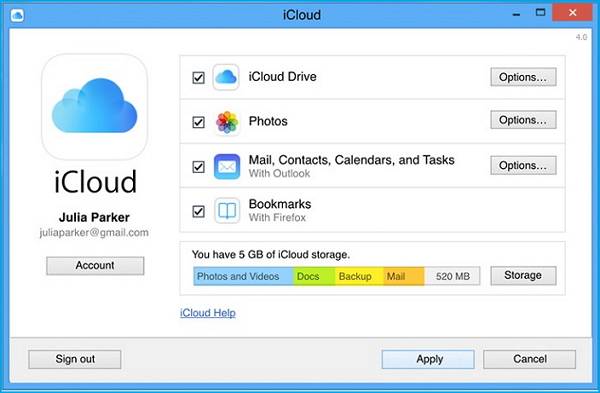
1. Open iCloud for Windows on your PC installed just now. For Mac users, please go to "Apple Menu" > click "System Preferences" > click "iCloud".
2. Log in your Apple ID account, and you will see "iCloud Drive", "Photos", "Mail, Contacts, Calendars, and Tasks", and "Bookmarks" on the right-side panel.
3. Now, you can check "Photos" and sync the files to all your devices via iCloud. Sometimes, you may find the iCloud photos not syncing with Mac, or iCloud contacts won’t upload to iPhone. If so, please check out online tutorials to fix the issues timely.
![icloud-control-panel]()
How to back up iPhone with an iCloud alternative
If your iCloud syncing is not working well suddenly while you need to back up iPhone data or you want to export some files not supported by iCloud, how to meet your demands with ease? Don't fret. Here comes EaseUS MobiMover Free, the top and 100% free iPhone data transfer software in the world that helps with how to access iPhone photos on PC and transfer files from iPhone to Mac at lightning speed. MobiMover Free nearly supports all iOS files, including contacts, messages, notes, calendars, voice mails, books, Safari bookmarks & history, photos, videos, and audio. Meanwhile, if you need to add ringtones to the new iPhone 8/8 Plus or download movies from iPhone to iPad, MobiMover Free can fulfill your needs with the "Transfer to This Device" and "Transfer to Other Device" features. The following steps are for importing iPhone data to a Windows computer and can also be applied to back up iPhone files to Mac. The only difference is that you need to download MobiMover Free for Mac instead of Win version.
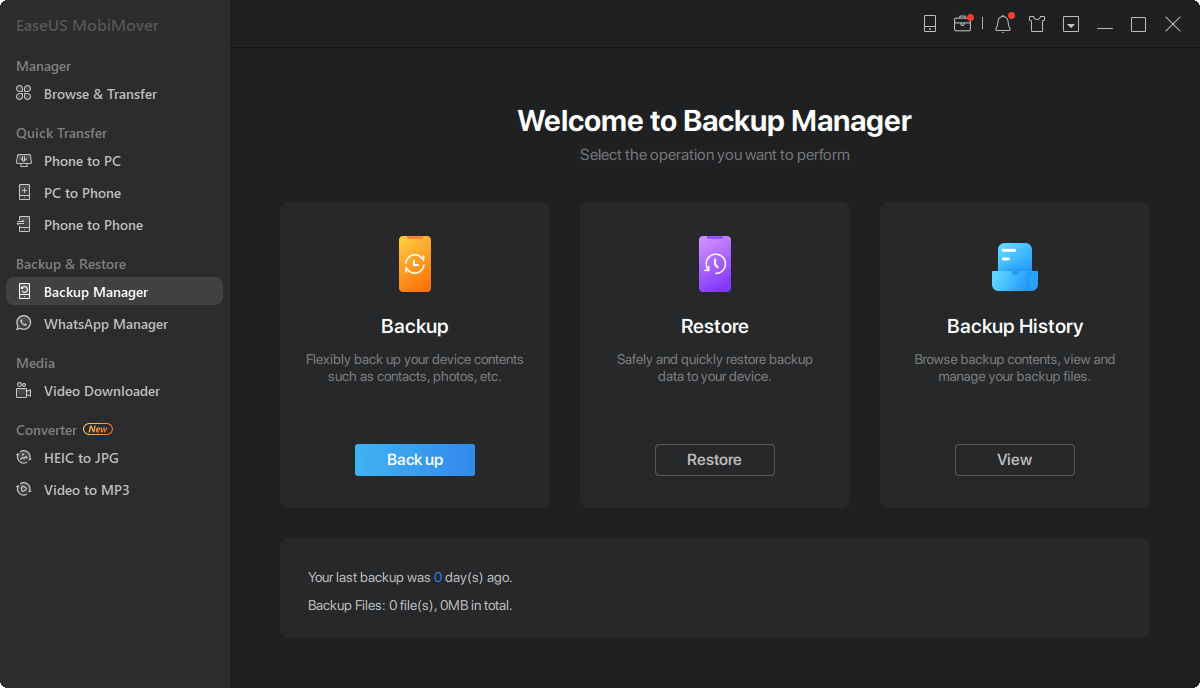
Step 1. Connect your iPhone to your PC running Windows 7/8/10 with a USB cable. Tap "Trust" on your iPhone screen if asked. Run EaseUS MobiMover and navigate to "Backup Manager" > "Back up".
Step 2. All the supported categories are selected by default. Click "One-Click" backup to start backing up your iPhone to PC.
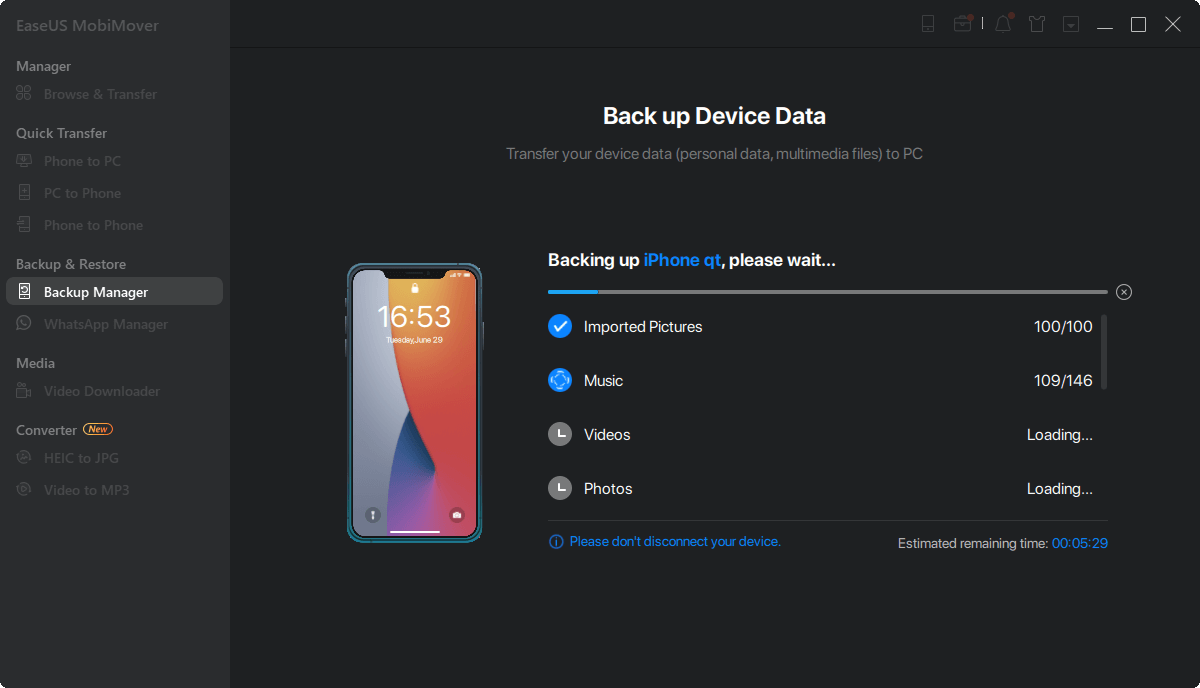
Step 3. Wait patiently until the backup process completes.

 NEW
NEW HOT
HOT